S3 preSigned url
1. 개요
기존에 S3에 파일을 저장할 때는 파일을 spring 서버로 보낸 후에 서버에서 S3와 연결해서 저장하는 과정으로 진행했다.
	public String saveImage(MultipartFile multipartFile, String type) throws IOException {
		if(multipartFile == null || type == null) {
			throw new CustomException(INPUT_INVALID_VALUE_ERROR);
		}

		String originalFilename = multipartFile.getOriginalFilename();
		String extend = originalFilename.substring(originalFilename.lastIndexOf('.') + 1);

		// 허용되는 확장자 리스트
		List<String> allowedExtentionList = Arrays.asList("jpg", "jpeg", "png");

		if(!allowedExtentionList.contains(extend)) {
			throw new CustomException(AWS_S3_IMAGE_EXTEND_ERROR);
		}
		String imagePath = "";

		String fileName = imagePath + createFileName(originalFilename).concat("." + extend);
		ObjectMetadata metadata = new ObjectMetadata();
		metadata.setContentLength(multipartFile.getSize());
		metadata.setContentType(multipartFile.getContentType());

		amazonS3.putObject(bucket, fileName, multipartFile.getInputStream(), metadata);

		String resourceURL = amazonS3.getUrl(bucket, fileName).toString();
		return resourceURL.substring(resourceURL.lastIndexOf("/"));
	}
1.1 문제점
파일을 서버에서 처리를 하다보니 처리가 완료될 때까지 서버는 해당 파일을 메모리 또는 디스크에 저장해두어야 된다. 이때 사용자가 대용량 파일이나 여러 개의 파일을 업로드 요청할 수도 있고 다수의 사용자가 파일 업로드를 요청할 수도 있다. 그렇게 되면 단순히 해당 파일을 처리하기 위해 저장하는 것만으로도 메모리, 디스크를 차지하기 때문에 성능 저하가 발생할 수도 있고 최악의 경우에는 OutOfMemoryError 가 발생할 수 있다. 또한 악의적인 유저가 파일을 업로드 하는 api를 알게 되는 경우 별다른 보안 조치 없이 해당 S3에 대한 업로드 권한을 얻을 수 있다.
이러한 문제를 해결하기 위해서 preSigned url 를 적용했다.
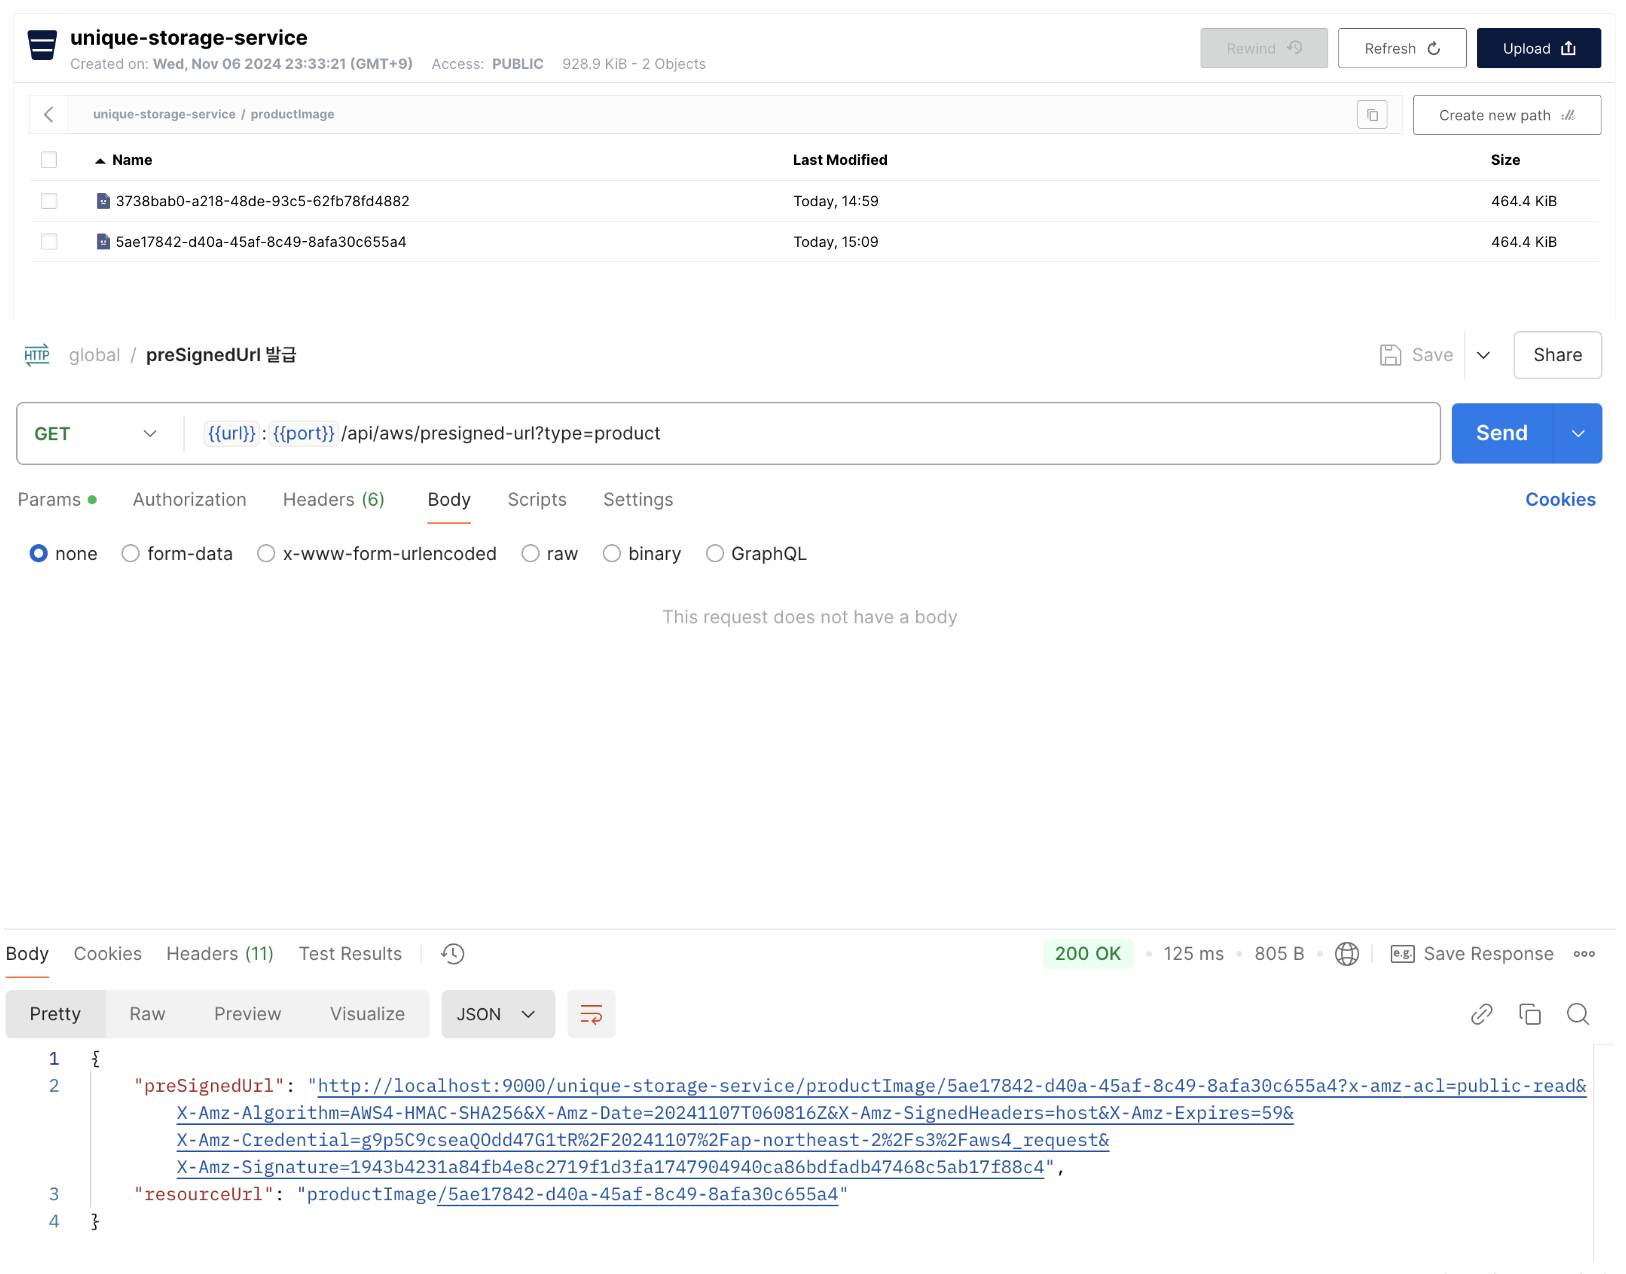
2. preSigned url
preSigned url 이란 S3 버킷에 직접 파일을 업로드할 수 있는 임시 링크이다.
파일을 업로드 하려는 사용자는 먼저 서버에게 preSigned url 발급 api를 호출하게 된다. 해당 요청을 받은 서버는 S3와 인증을 진행한 후에 특정 권한(업로드, 조회, 삭제)이 부여된 url을 발급받게 되고 이를 클라이언트에게 반환한다. 그 다음 클라이언트는 해당 url을 사용해서 파일 업로드를 진행할 수 있다.
2.1 장점
파일 업로드할때 기존에는 서버를 거쳐서 S3에 저장되었다. 이로 인해 해당 파일이 서버의 메모리를 차지하게 되는 문제를 해결할 수 있다. 클라이언트는 단순히 preSigned URL을 요청하면 되고 해당 URL을 통해 파일을 S3로 직접 저장하게 되니 서버의 부담이 감소해 서버 자원을 절약할 수 있다.
해당 preSinged URL에 만료시간을 지정할 수 있다. 이로 인해 해당 url이 유출되더라도 시간이 지나게 되면 만료가 되어 쓸모가 없어진다. 또한 각각의 preSigned URL에 특정 권한(업로드, 다운로드, 삭제)을 설정할 수 있다. 이러한 이유들로 preSigned URL에 적절한 만료시간과 권한을 설정해줘야 된다.
3. 적용
private static Date getExpiration() {
Date expiration = new Date();
long expTimeMillis = expiration.getTime();
expTimeMillis += 1000 * 60; // 1시간으로 설정하기
expiration.setTime(expTimeMillis);
return expiration;
}
// preSigned url 요청 설정 객체 생성
private GeneratePresignedUrlRequest getPutGeneratePresignedUrlRequest(String fileName, Date expiration) {
GeneratePresignedUrlRequest generatePresignedUrlRequest
= new GeneratePresignedUrlRequest(bucket, fileName)
.withMethod(HttpMethod.PUT)
.withKey(fileName)
.withExpiration(expiration);
generatePresignedUrlRequest.addRequestParameter(
Headers.S3_CANNED_ACL,
CannedAccessControlList.PublicRead.toString());
return generatePresignedUrlRequest;
}
// 실제 preSigned url 생성
public PreSignedUrlResponse generatePreSignedUploadUrl(String type) {
String imagePath = "";
String filePath = imagePath + createFileName();
GeneratePresignedUrlRequest request = getPutGeneratePresignedUrlRequest(filePath, getExpiration());
String preSignedUrl = amazonS3.generatePresignedUrl(request).toString();
return new PreSignedUrlResponse(preSignedUrl, filePath);
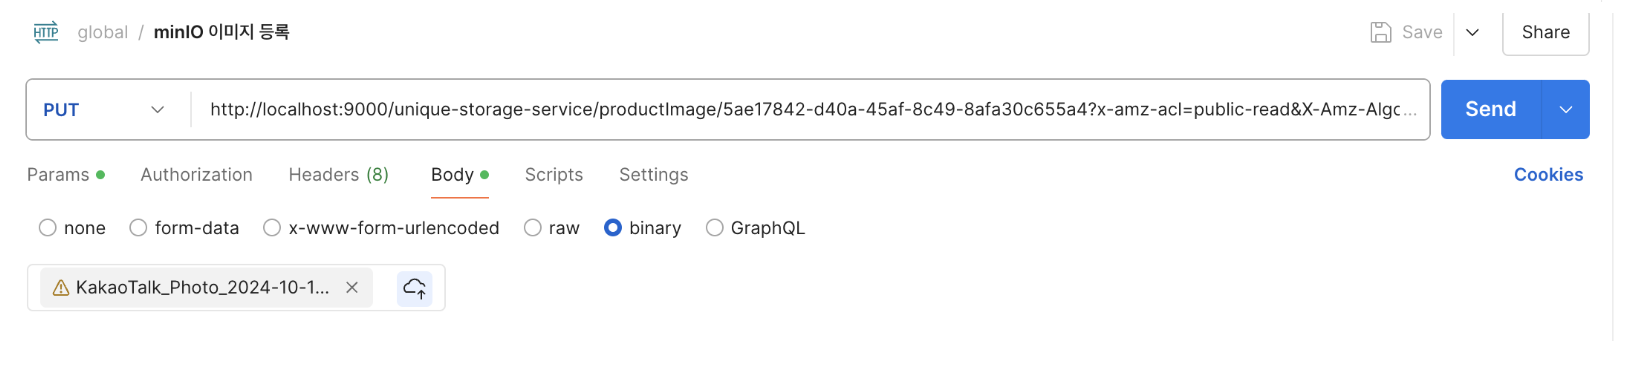
}3.1 결과 화면